How Does a Kitchen Storage Hardware Factory Handle Product Development?
When buyers approach us with a competitor's image and ask, "Can you make this with a slightly bigger capacity?"—they often expect a quick yes. But in kitchen hardware OEM, that seemingly small change might mean starting from scratch with a completely new mold. I've seen this misunderstanding cause timeline delays, budget blowouts, and even project cancellations.
Product development in kitchen storage hardware isn't about saying yes to every design request—it's about evaluating which changes fit within existing tooling constraints, which require new molds, and how those decisions affect cost, timeline, and compliance. Most "small tweaks" buyers request actually trigger full tooling replacement because they alter structural parameters that molds cannot accommodate through adjustments.

What I'm sharing here comes from handling hundreds of customization requests—from importers needing compliance-ready bread boxes to distributors wanting modified dish racks. I'll walk you through how we actually evaluate feasibility, where hidden costs appear, and what questions you should ask before assuming a design change is simple.
Why Do "Minor Design Changes" Often Require New Tooling?
When a client emails us a photo of a competitor's bread box and writes, "Same design, but increase the width by 30mm and add a ventilation pattern on the lid"—they think this is a minor modification. From their perspective, the product looks almost identical. But from a tooling standpoint, this request might require two completely new mold sets.
Molds for kitchen hardware products are precision-made steel cavities that define every structural dimension of the final part.1 When you change parameters like container volume, panel dimensions, or load-bearing angles, you're not adjusting the mold—you're asking for a different mold. The existing tooling cannot physically produce a larger or differently shaped part because the cavity itself is fixed.2
Let me explain this with a real example. Last year, an importer approached us with a bread box project. They provided a competitor sample and asked for a 15% capacity increase. They assumed we could "open up" the existing mold cavity to make it bigger. But here's the problem: increasing internal volume means changing the base area, wall height, or both3. If the base area changes, the bottom panel mold needs to be remade. If the wall height changes, the side panel tooling needs adjustment—but if that adjustment affects the folding angles where panels connect, the entire structural assembly changes, and you need new tooling for every connecting part.
In that case, the client didn't realize that their "small request" would cost an additional $8,000 in tooling and add six weeks to the timeline. They thought they were getting a quick modification. What they actually needed was a new product with new molds.
This happens constantly with these types of requests:
- Changing container capacity (requires new base and wall molds if dimensions shift)
- Adjusting shelf spacing in racks (affects bracket positioning and may require new side panel tooling)
- Altering handle placement on storage cabinets (might conflict with internal reinforcement structure, requiring frame redesign)
- Adding drainage holes to dish racks (if the hole pattern changes load distribution, the entire base plate might need re-engineering)
The reason we can't just "adjust" the mold is because each mold component is machined to exact tolerances4. You can't stretch a steel cavity. You can't shift hole patterns without remachining the entire surface. If the design change affects any structural parameter, the mold cannot accommodate it—you're not modifying a product, you're creating a new one.
When Can Modifications Use Existing Tooling?
Not every customization request requires new molds. Some changes stay within the boundaries of what existing tooling can handle. The key is understanding which variables are fixed by structural design and which are adjustable through surface treatment, material selection, or assembly configuration.
If your design change doesn't alter the mold cavity's structural dimensions—meaning the part shape, volume, and load-bearing features stay identical—then we can work with existing tooling and adjust other variables like surface finish, material grade, or accessory components.
Here's what we can typically adjust without new tooling:
| Modification Type | Feasibility with Existing Tooling | Why It Works |
|---|---|---|
| Surface finish (powder coating color, brushed vs. polished) | Yes | These are post-molding processes that don't affect the part geometry |
| Material substitution (same gauge, different alloy) | Sometimes | Only if the new material has similar forming properties and doesn't require different welding or bending processes |
| Branding and packaging | Yes | These happen after production and don't touch the mold |
| Accessory swaps (different handle style, alternative shelf clips) | Yes | As long as the mounting points and structural interface stay the same |
| Assembly configuration (how many shelves, which accessories to include) | Yes | The individual parts remain the same; only the final assembly changes |
Last month, a distributor wanted a custom version of our rotating spice rack. They requested a different powder coating color, custom laser-engraved branding on the base, and a higher-grade stainless steel for the rotating mechanism. All of these changes were feasible without new tooling because the actual part geometry stayed identical. The mold cavity didn't need to change—we adjusted post-production processes and material sourcing instead.
But here's where it gets tricky: material substitution. A client once asked us to switch from cold-rolled steel to stainless steel for a bread box to meet EU compliance standards. They assumed this was a simple swap. But stainless steel has different forming characteristics—it requires higher bending force and different welding techniques5. The existing mold could technically form the part, but the welding jigs and surface treatment process had to be reworked. The part shape stayed the same, but the production process changed significantly. That's not a tooling cost, but it's a process re-engineering cost that the client didn't anticipate.
So when you're evaluating whether a modification fits existing tooling, ask this: Does my change affect the part's physical dimensions, structural volume, or load-bearing features? If yes, you need new tooling. If no, you're adjusting production variables, which is cheaper and faster but still not always free.
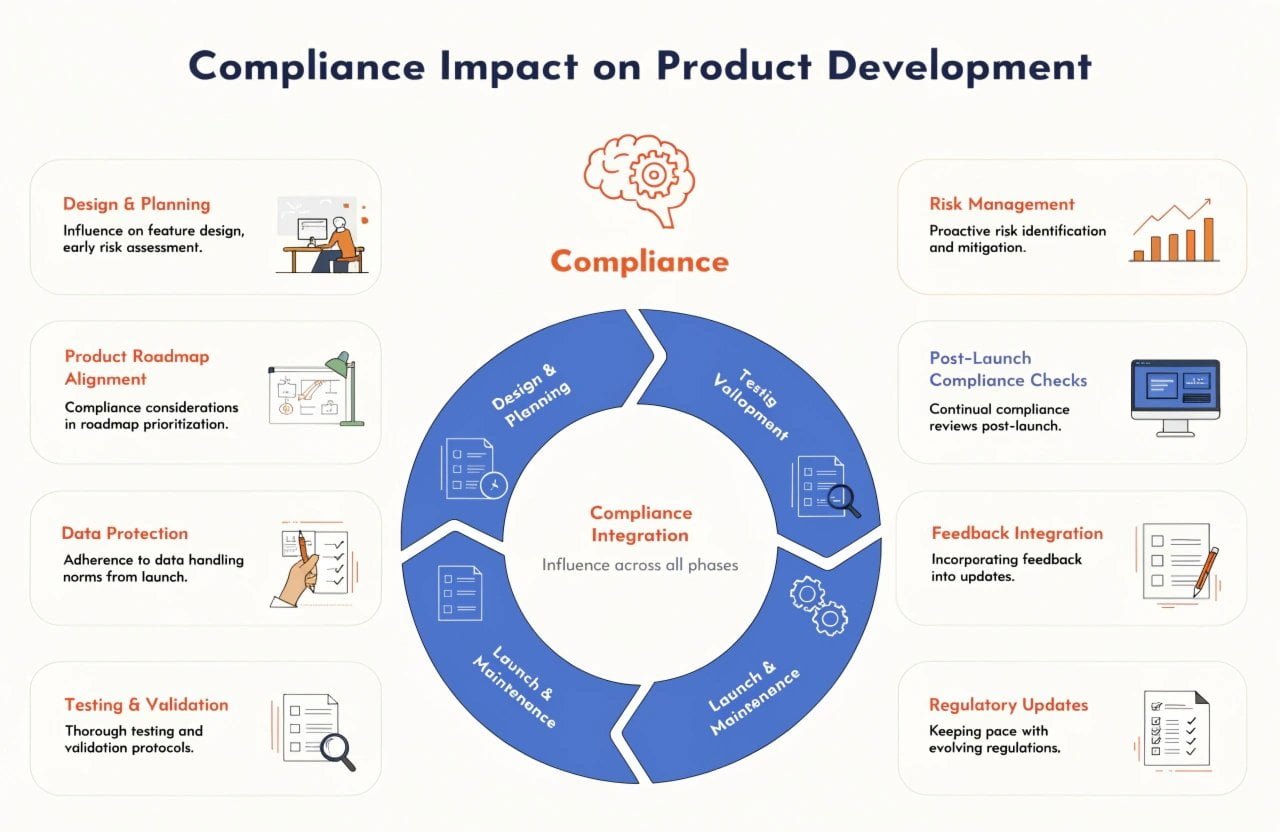
What Happens When Importers Request Compliance-Ready Products?
Importers often approach us with a compliance requirement: "We need this bread box to meet EU food contact standards" or "This dish rack needs to pass US stability testing." They assume compliance is about paperwork. But in product development, compliance requirements often force material or design changes—and those changes can trigger tooling decisions.
Compliance isn't just documentation—it's a technical constraint that may require material substitution, structural reinforcement, or surface treatment changes. If those adjustments affect mold-dependent features, you're not just getting a certified product; you're developing a new one.
Here's a real example. An importer needed a knife holder for the Japanese market, where products in direct food contact must meet strict material purity standards. The original design used a plastic insert coated with antimicrobial treatment. But the coating didn't meet Japan's positive list for food contact substances6. The client asked us to remove the coating and use a certified raw material instead.
This seemed straightforward—just switch materials. But the original plastic insert was designed with specific wall thickness to accommodate the coating's adhesion process. Removing the coating meant the surface would be bare plastic, which had different friction properties. The knife slots needed to be slightly tighter to maintain grip without the coating's texture. That small adjustment—making the slots 2mm narrower—required a new mold insert because the existing cavity couldn't be machined tighter without compromising structural integrity.
The project didn't fail, but the client hadn't budgeted for new tooling. They thought compliance was about submitting test reports. What they actually faced was a redesign project that added $5,000 in tooling costs and delayed the timeline by five weeks.
This is where compliance and tooling economics collide. The cost of new tooling might not justify the project if the order volume is small. I've seen importers cancel projects after realizing that compliance-driven design changes would require tooling investment they couldn't recover through their planned sales volume.
Here's what compliance-related changes often trigger:
- Material substitution: If the new material has different forming properties (e.g., switching from ABS plastic to food-grade PP), the mold cooling time and injection pressure may need adjustment. If the difference is significant, the mold itself might need modification.
- Structural reinforcement: Safety standards sometimes require additional thickness or reinforcement ribs. If those features don't exist in the current design, the mold needs new cavities or inserts.
- Surface treatment changes: Coatings, textures, and finishes that affect dimensional tolerances (like powder coating adding thickness7) may require compensating adjustments in the mold cavity.
The key question to ask before assuming compliance is just a certification task: Will meeting this standard require any change to the part's material, dimensions, or surface properties? If yes, you need to evaluate whether those changes fit existing tooling or require new investment.
How Do We Evaluate Whether a Customization Request Is Commercially Viable?
When a client sends us a competitor sample and says, "Can you make this but with a few changes?"—our first response isn't "Yes" or "No." It's "Let's evaluate the tooling impact and see if the economics work." Because even if we can technically make the product, that doesn't mean the project makes commercial sense.
Product development viability isn't just about technical feasibility—it's about whether the tooling investment aligns with the client's order volume, timeline, and margin expectations. A project that requires $15,000 in new tooling needs a minimum order quantity high enough to absorb that cost.
Here's how we assess whether a customization request is worth pursuing:
Step 1: Identify which design changes affect tooling. We compare the client's request against our existing product library. If they want a bread box with a different lid hinge mechanism, we check whether that hinge requires new mounting holes, different panel thickness, or altered structural reinforcement. If yes, we flag it as a tooling change.
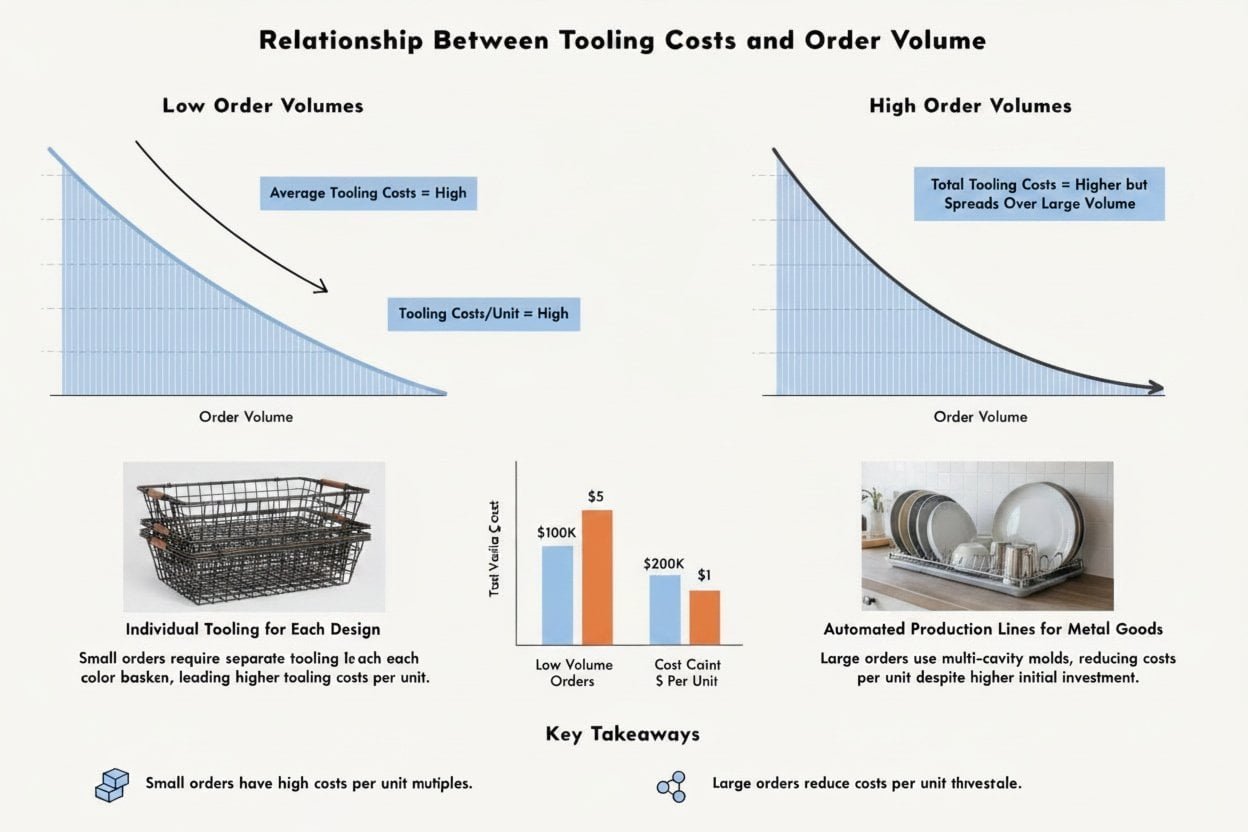
Step 2: Calculate the tooling investment. Each new mold component has a cost. A simple single-cavity mold for a flat panel might cost $3,000. A complex multi-cavity mold for a structural frame might cost $12,000.8 We add up every component that needs new tooling and present the total investment required.
Step 3: Determine the break-even order quantity. If the tooling costs $10,000 and the client's margin per unit is $2, they need to sell at least 5,000 units just to recover the tooling cost—before they make any profit. We calculate this break-even point and discuss whether the client's expected sales volume justifies the investment.
Step 4: Evaluate timeline impact. New tooling doesn't just cost money—it adds time. Mold design, machining, testing, and adjustment typically take 4–8 weeks.9 If the client needs product in two months, a project requiring new tooling won't meet their deadline.
I once worked with a distributor who wanted a custom under-sink storage rack. They provided a competitor image and requested a modified version with adjustable height settings and a pull-out drawer. Both changes required new tooling. The total investment was $14,000. Their planned first order was 2,000 units. At their target margin, they wouldn't break even until their third order. After we presented this breakdown, they decided to start with a standard model instead and revisit customization once their sales volume grew.
This isn't about discouraging customization—it's about making sure clients understand the economics before committing. Some projects make sense. Others don't. The evaluation process exists to prevent surprises halfway through development.
What Are the Hidden Costs in "Low-Cost Customization" Requests?
Clients often approach us saying, "We just want a minor tweak to an existing product—it should be quick and cheap." But in my experience, there's no such thing as a low-cost customization unless the change truly fits within existing tooling constraints. Even small modifications create hidden costs that buyers don't anticipate.
The "minor tweak" expectation collides with tooling economics when clients assume that small design changes should cost proportionally less than major ones. But tooling costs are binary—you either use existing molds (minimal cost) or create new ones (fixed high cost). There's no middle ground.
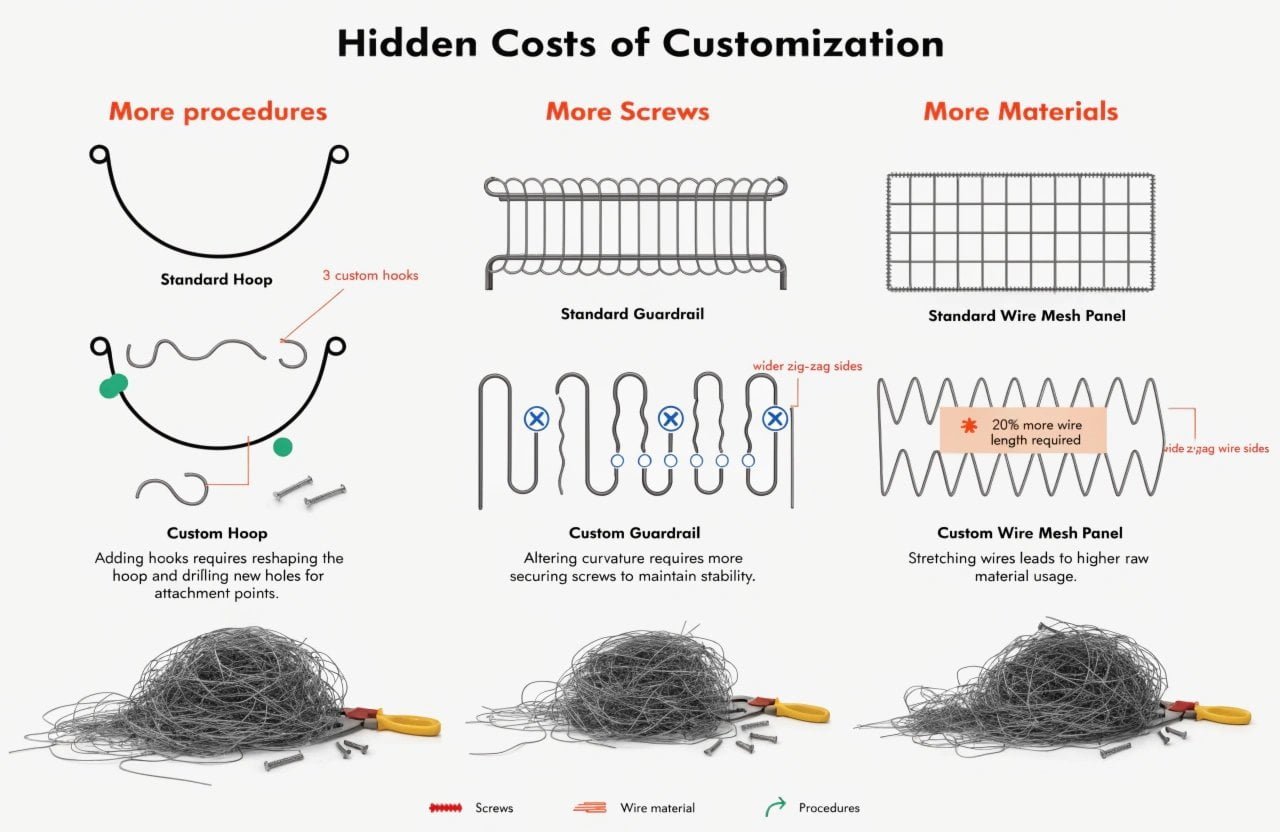
Here are the hidden costs that appear in customization projects:
Tooling re-engineering: Even if you're modifying an existing mold rather than creating a new one from scratch, the machining cost isn't proportional to the change size. Adjusting a single mounting hole position might require remachining an entire mold plate, which can cost $2,000–$5,000.
Sample iteration: Custom designs rarely get approved on the first sample. Each iteration cycle includes material cost, labor, and shipping. If the client requests three rounds of adjustments, those sample costs add up to $1,000–$3,000 depending on product complexity.
Compliance re-testing: If the design change affects materials or structural features, you might need to re-run certification tests. A drop test for a storage cabinet costs $800. A food contact material test costs $1,200.10 These aren't included in base product pricing because standard products already have certifications.
Production line reconfiguration: If your custom design requires different welding sequences, altered assembly steps, or new quality checkpoints, the production line needs reconfiguration. That's a labor cost and efficiency loss that gets absorbed into the per-unit price.
I worked with a brand owner who wanted a custom knife holder with a magnetic strip on the back instead of the standard countertop base. They thought this was a simple feature addition. But the magnetic strip required new mounting holes in the back panel, which meant a new mold for that panel. The strip itself had to be sourced from a different supplier, adding lead time. The assembly process changed because workers had to align the magnet precisely before welding. The "simple addition" added $4,000 in tooling, $600 in sample costs, and $0.80 per unit in assembly labor. The client's original expectation was $0.30 per unit for the customization.
The reason these costs stay hidden is because clients evaluate customization as if it's an incremental design change, when it's actually a series of production adjustments. Every change ripples through tooling, sourcing, assembly, and quality control. If you're not accounting for those ripple effects, your cost estimate will be wrong.
How Should Buyers Communicate Design Modifications to Avoid Misunderstandings?
The biggest source of delays in custom product projects isn't technical complexity—it's miscommunication about what the client actually wants and what's feasible with existing tooling. When a buyer sends us a vague request like, "Make it look more modern," we can't move forward until we clarify exactly which design elements they want changed and whether those changes require new tooling.
Clear communication in product development means specifying which structural features, dimensions, and materials are negotiable and which are fixed. The faster a buyer identifies whether their request affects mold-dependent features, the faster we can provide an accurate feasibility assessment.
Here's what helps us evaluate requests quickly:
Be specific about dimensional changes. Instead of saying, "Can you make the bread box bigger?" tell us: "I need the internal capacity increased from 12 liters to 15 liters, and I'm flexible on how that's achieved—either by increasing height, width, or depth." That lets us evaluate which dimension change has the lowest tooling impact.
Identify your non-negotiable requirements. If you need a specific material for compliance reasons, say that upfront. If you need a certain weight limit for stability testing, mention it. This prevents us from proposing solutions that won't meet your constraints.
Provide reference images with annotations. When you send a competitor sample, mark the specific features you want to change. Use arrows, text notes, or measurements. "Make it look different" is unhelpful. "Change the handle from loop-style to recessed grip, similar to this reference image" gives us something actionable.
Ask about tooling impact before committing to the design. A good question to ask is: "If I change this feature, will it require new tooling?" That forces the conversation to focus on economics early, before you've invested time in a design that turns out to be too expensive.
Clarify your volume expectations. If you're testing the market and your first order will be 500 units, tell us. That context changes how we evaluate tooling investment. We might suggest starting with a standard product and customizing later, or we might propose design changes that minimize tooling costs.
I once had a client who wanted a custom storage cabinet. They sent three competitor images and said, "Something like these, but unique." That's not enough information. I asked: "Which specific features from each image do you want to combine? What's your target price point? What's your first order quantity?" Once they answered those questions, we identified that they wanted a hybrid
"Injection moulding - Wikipedia", https://en.wikipedia.org/wiki/Injection_moulding. Injection molds are precision-engineered steel tools where cavity dimensions directly determine the final part geometry, with typical tolerances ranging from ±0.05mm to ±0.2mm depending on part complexity and material properties. Evidence role: mechanism; source type: education. Supports: the precision engineering principles behind injection mold cavities and how they determine final part dimensions. Scope note: This describes general injection molding principles; specific tolerances for kitchen hardware may vary by manufacturer and product requirements. ↩
"How Big Of A Part Can You Injection Mold? - Advance Plastics", https://advanceplastics.com/2023/02/15/how-big-of-a-part-can-you-injection-mold/. Injection mold cavities are machined as negative impressions of the desired part geometry in hardened steel, creating a fixed three-dimensional space that defines the maximum part dimensions; producing a larger or differently shaped part requires either a new cavity or removable inserts, as the hardened steel cannot be expanded or reshaped without complete remachining. Evidence role: mechanism; source type: education. Supports: the physical constraints that prevent mold cavities from producing parts with different dimensions than originally designed. ↩
"Volume Calculator", https://www.calculator.net/volume-calculator.html. For rectangular containers, volume is calculated as length × width × height, meaning any volume increase must result from increasing at least one of these three dimensions. Evidence role: mechanism; source type: education. Supports: the geometric relationship between container volume and dimensional parameters. ↩
"Understanding Injection Molding Tolerances", https://www.protolabs.com/resources/blog/injection-molding-tolerances/. Mold components are typically machined to tolerances of ±0.01mm to ±0.05mm for critical dimensions, with surface finishes often specified to Ra values below 0.4μm for cosmetic surfaces. Evidence role: mechanism; source type: education. Supports: the precision machining standards required for injection mold manufacturing. Scope note: These represent typical industry standards; specific projects may require tighter or looser tolerances depending on part requirements. ↩
"What Are the Differences Between Stainless Steel & Cold Rolled ...", https://www.meadmetals.com/blog/what-are-the-differences-between-stainless-steel-and-cold-rolled-steel. Stainless steel typically requires 20-30% higher bending forces than equivalent-thickness carbon steel due to its higher yield strength, and requires different welding parameters including lower heat input and inert gas shielding to prevent chromium carbide precipitation. Evidence role: mechanism; source type: education. Supports: the differences in forming and welding requirements between stainless steel and carbon steel. Scope note: Specific requirements vary by stainless steel grade (304, 316, etc.) and carbon steel type. ↩
"Japan updates food contact materials positive list", https://foodpackagingforum.org/news/japan-updates-food-contact-materials-positive-list. Japan's Food Sanitation Law employs a positive list system for food contact materials, specifying which substances are permitted for use rather than prohibiting specific substances, as administered by the Ministry of Health, Labour and Welfare. Evidence role: general_support; source type: government. Supports: Japan's regulatory approach to food contact materials. ↩
"How Thick Should a Powder Coat Be? The Sweet Spot for ...", https://blog.powderx.com/post/ideal-powder-coating-thickness-guide. Powder coating typically adds 50-100 micrometers (0.05-0.1mm) of thickness to coated surfaces, though this can range from 25-300 micrometers depending on application requirements and coating type. Evidence role: statistic; source type: education. Supports: the typical thickness added by powder coating processes. ↩
"Injection Molding Cost Calculator | ZetarMold", https://zetarmold.com/injection-molding-cost-calculator/. Industry surveys indicate injection mold costs typically range from $2,000-$5,000 for simple single-cavity molds to $10,000-$50,000+ for complex multi-cavity molds, with significant variation based on part size, tolerance requirements, and production volume expectations. Evidence role: statistic; source type: other. Supports: typical cost ranges for injection mold tooling by complexity level. Scope note: These are general industry ranges; actual costs vary significantly by region, manufacturer, material, and specific design requirements. ↩
"Understanding Lead Times in Injection Molding for Production ...", https://www.aprios.com/insights/lead-times-in-injection-molding-essential-insights-for-engineers. Industry standards indicate injection mold development typically requires 4-12 weeks depending on complexity, including design (1-2 weeks), machining (2-6 weeks), and testing/adjustment (1-4 weeks), with simpler molds at the shorter end and complex multi-cavity molds requiring longer timelines. Evidence role: statistic; source type: other. Supports: typical lead times for injection mold development from design to production-ready status. Scope note: These are typical ranges; actual timelines vary by mold complexity, manufacturer capacity, and revision requirements. ↩
"Chemistry Recommendations for Submissions of Food Contact ...", https://www.fda.gov/regulatory-information/search-fda-guidance-documents/guidance-industry-preparation-premarket-submissions-food-contact-substances-chemistry. Third-party testing laboratory fees typically range from $500-$1,500 for mechanical drop testing and $800-$2,500 for food contact material migration testing, depending on test complexity, number of materials tested, and turnaround time requirements. Evidence role: statistic; source type: other. Supports: typical costs for product safety and compliance testing. Scope note: These are approximate ranges based on commercial testing services; actual costs vary by laboratory, test standards required, and sample quantity. ↩